Remote Connections (IA)
Use the Remote Connection page to establish a secure connection between your private network and BigPanda. This allows AI agents to access private observability tools, databases, and internal APIs without exposing inbound ports.
The relay client is a lightweight Docker container deployed inside your private network. It establishes a secure, outbound-only WebSocket tunnel to the BigPanda relay listener, allowing Biggy to communicate with internal systems without requiring any inbound firewall rules. Use the relay client to connect monitoring APIs, MCP servers, on-premise ITSM platforms, and more.
IP whitelist required
The IP addresses from which your relay client originates requests must be whitelisted by BigPanda. Contact your BigPanda account team to request whitelisting.
Connections from non-whitelisted IP addresses will receive a 403 Forbidden response.
The Remote Connections page is located in the web app at Configuration > Remote Connections.
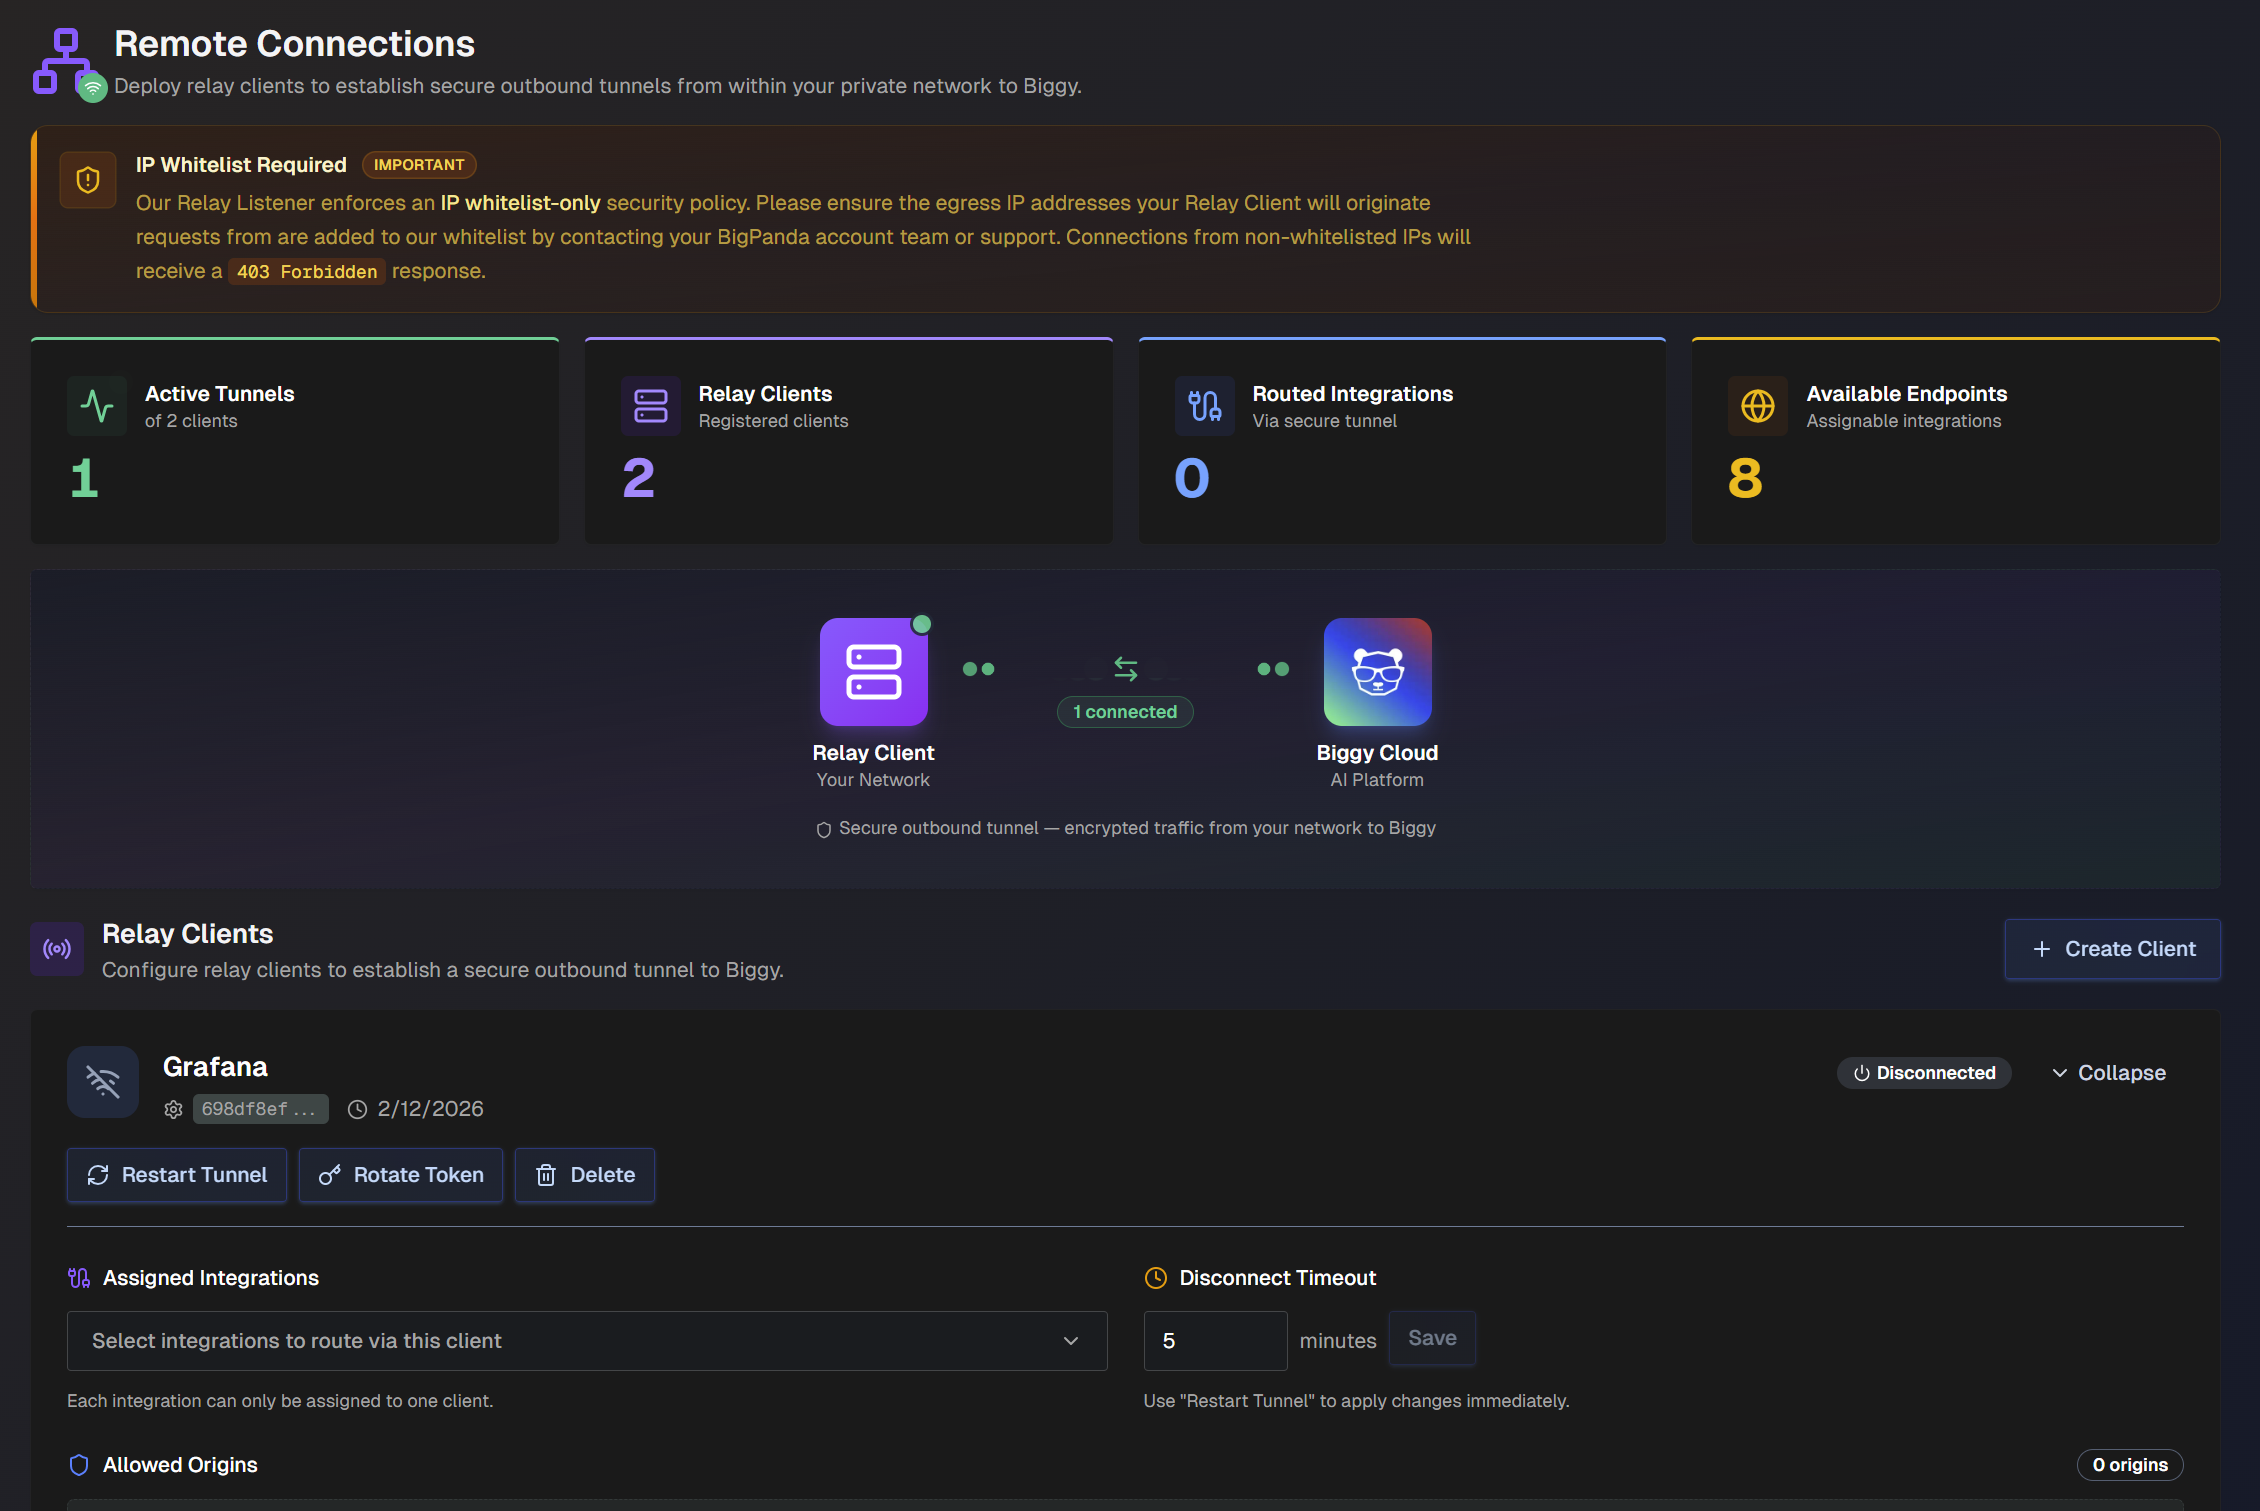
At the top of the Remote Connections page, information about your active relay clients is displayed. The following details are available:
Number of active tunnels
Number of registered relay clients
Number of routed integrations via secured tunnel
Number of available endpoints (integrations that can be assigned to a relay client)
Create a Relay Client
To create a new relay client:
On the Remote Connections page, click + Create Client.
In the Create Relay Agent window, enter a Client Name and the Disconnect Timeout in minutes.
Disconnect timeout
Clients will be marked as disconnected if the disconnect timeout period is reached without communication.
Click Create Client.
In the Relay Client Token window, there are three tabs: Token, Docker, and Kubernetes. Copy the token information. The Docker and Kubernetes tabs contain instructions. You can also reference the Installation Documentation.
Copy token
The token is only displayed once, so be sure to copy it and store it securely.
Proxy server
If you are using a proxy server, you'll need to add a line with your proxy URL when running the relay client.
Example:
docker run --detach --restart unless-stopped --name biggy-relay-client \
  --env RELAY_TOKEN='<token>' \
  --env RELAY_URL='wss://relay.biggy.io/ws/client' \
  --env HTTPS_PROXY='http://<proxy url>' \
  bigpandaio-biggy-docker.jfrog.io/relay-client:latest
Click Done.
The new agent appears in the Relay Agents section of the page. In the Assigned Integrations drop-down, select the integrations to route via this agent.
Integration assignment
Each integration can only be assigned to one agent.
Install the Relay Client
The relay client can be installed using Docker or Kubernetes.
The following prerequisites are required before beginning installation:
Docker must be version ≥ 20.10, or you must have a Kubernetes cluster with Docker image pull access.
An outbound network must have access to
wss://relay.dev.biggy.io/ws/clienton port 443.A relay token must be generated using the Create a Relay Client steps.
Your egress IP address must be whitelisted. Contact your BigPanda account team for whitelisting.
Environment Variables
When installing the relay client, note the following variables in the installation instructions:
Variable | Required | Default | Description |
|---|---|---|---|
| Yes | Authentication token from Remote Connections UI. | |
| No |
| WebSocket endpoint. Only set if using custom endpoint provided by BigPanda. |
| No |
| Logging verbosity. One of: |
| No | Corporate HTTP proxy URL for outbound WebSocket | |
| No | Path to PEM file with extra CA certificates |
Relay Client Docker Installation
To install the relay client using Docker:
Pull the image:
docker pull bigpandaio-biggy-docker.jfrog.io/relay-client:latest
Run the container:
docker run --detach --restart unless-stopped \
 --name biggy-relay-client \
 --env RELAY_TOKEN='' \
 --env RELAY_URL='wss://relay.dev.biggy.io/ws/client' \
 bigpandaio-biggy-docker.jfrog.io/relay-client:latest
Relay Client Kubernetes Installation
To install the relay client using Kubernetes, use the following code:
apiVersion: v1
kind: Secret
metadata:
 name: biggy-relay-client
type: Opaque
stringData:
 RELAY_TOKEN: ""
---
apiVersion: apps/v1
kind: Deployment
metadata:
 name: biggy-relay-client
spec:
 replicas: 1
 selector:
 matchLabels:
 app: biggy-relay-client
 template:
 metadata:
 labels:
 app: biggy-relay-client
 spec:
 containers:
 - name: relay-client
 image: bigpandaio-biggy-docker.jfrog.io/relay-client:latest
 env:
 - name: RELAY_TOKEN
 valueFrom:
 secretKeyRef:
 name: biggy-relay-client
 key: RELAY_TOKEN
 - name: RELAY_URL
 value: "wss://relay.dev.biggy.io/ws/client"
Corporate Proxy Configuration
If your network routes outbound traffic through an HTTP proxy, set the HTTPS_PROXY environment variable. The relay client supports both uppercase and lowercase variants with precedence: HTTPS_PROXY > https_proxy > HTTP_PROXY > http_proxy.
HTTP CONNECT required
Your proxy must support the HTTP CONNECT method for WebSocket upgrade. Standard HTTP-only proxies will not work.
Docker
docker run --detach --restart unless-stopped \
 --name biggy-relay-client \
 --env RELAY_TOKEN='' \
 --env HTTPS_PROXY='http://proxy.corp.com:8080' \
 bigpandaio-biggy-docker.jfrog.io/relay-client:latest
Kubernetes
env:
 - name: HTTPS_PROXY
 value: "http://proxy.corp.com:8080"
TLS and Private CA Certificates
If your network uses a private Certificate Authority (self-signed or corporate CA), Node.js will not trust those certificates by default. Mount your CA bundle into the container and set NODE_EXTRA_CA_CERTS.
Docker
docker run --detach --restart unless-stopped \
 --name biggy-relay-client \
 --env RELAY_TOKEN='' \
 -v /path/to/ca-bundle.pem:/etc/ssl/certs/custom-ca.pem:ro \
 --env NODE_EXTRA_CA_CERTS='/etc/ssl/certs/custom-ca.pem' \
 bigpandaio-biggy-docker.jfrog.io/relay-client:latest
Kubernetes
volumes:
 - name: ca-certs
 secret:
 secretName: custom-ca-bundle
containers:
 - name: relay-client
 volumeMounts:
 - name: ca-certs
 mountPath: /etc/ssl/certs/custom-ca.pem
 subPath: ca-bundle.pem
 readOnly: true
 env:
 - name: NODE_EXTRA_CA_CERTS
 value: "/etc/ssl/certs/custom-ca.pem"
Verify the Connection
After installing the relay client, verify the connection:
After starting the container, check the logs:
docker logs biggy-relay-client.Look for
Connected to relay listenerand arelay_client_idin the JSON log output.In the web app, the relay client card should show a green Connected status.
If the connection fails, check your IP whitelist status and network egress rules.
Troubleshoot the Relay Client
Symptom | Resolution |
|---|---|
403 forbidden on connect | The IP likely has not been whitelisted. Contact your BigPanda account team to add your egress IP address. |
Connection timeout | Firewall may be blocking WSS/443. Allow outbound WSS to |
TLS handshake failure | This issue occurrs when the Private CA is not trusted. Set |
Repeated reconnects | The proxy is likely dropping WebSocket. Ensure the proxy supports the CONNECT method. |
502 or 504 on proxied requests | The target is unreachable. Verify the relay client can reach the target. |
Manage Relay Clients
In the Relay Clients section of the page, manage your existing active and inactive relay clients.
Select Restart Tunnel to force the relay client to disconnect and then reconnect. We recommend using this option when making changes to assigned integrations, disconnect timeouts, or after rotating the token.
Select Rotate Token to update the relay client token. Be sure to copy it securely, as it will not be displayed again once you close the window.
Select Delete to permanently delete the relay client. Deleting a relay client disconnects any active tunnel. Integrations assigned to this client will no longer be routed through the tunnel until reassigned to another client.